We’re excited to announce our latest update to Advanced Script. In this update, we have added some of the most requested features: Script Folders and Date/Time conditions
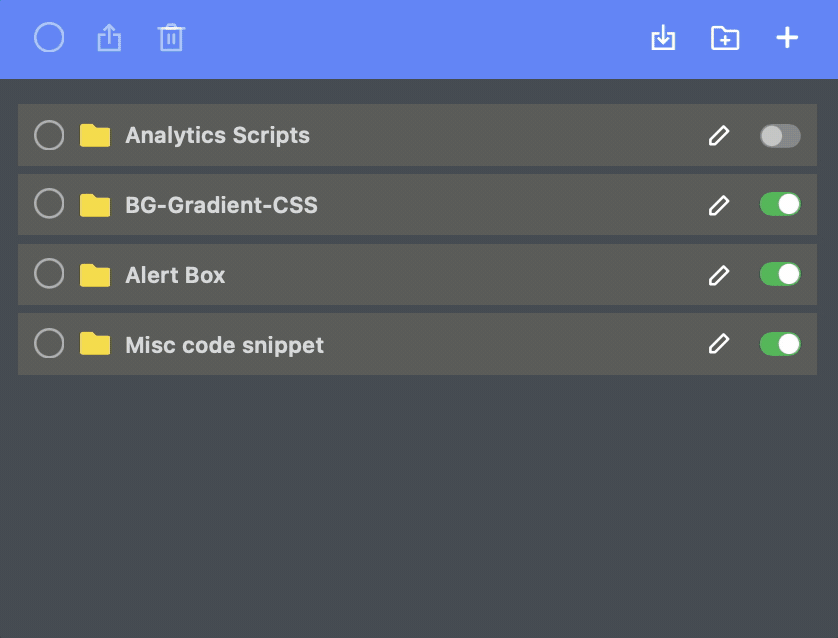
Script folders for better organisation.
You can create and give names to folders to organize your scripts. We have implemented a drag and drop feature which allows you to easily drag a script in or out of a folder.
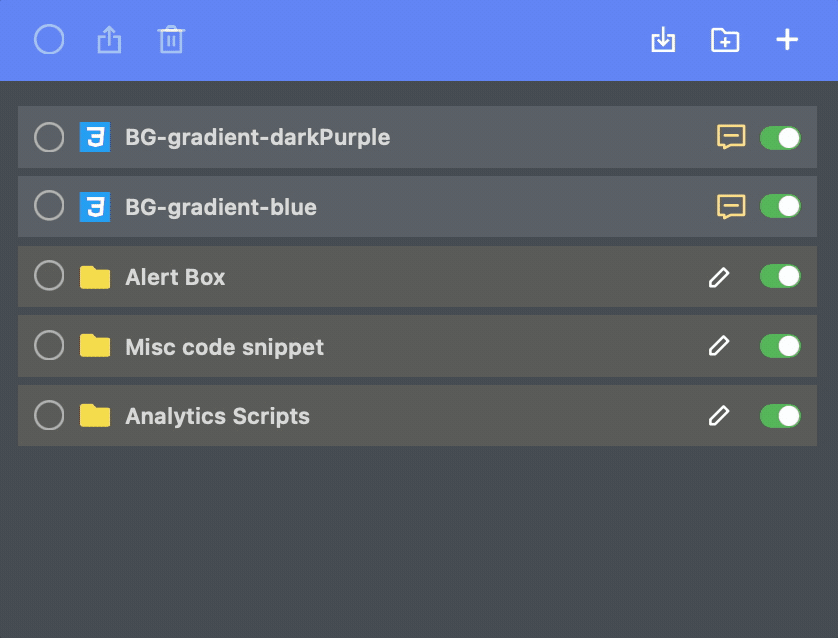
Tips: When a folder is opened, any new scripts you create are placed inside that folder.
Tips: To maneuverer between your script folders, click the home button to go back to the previous menu.
Tips: If the folder is toggled ON (the green toggle), it will automatically enable all the scripts inside that folder, unless the scripts inside the folder are switched OFF. This means, even by toggling ON the parent folder, it won’t force-enable any particular child scripts if they are switched OFF.
Date and time conditions.
Now it's possible to set condition(s) for the date and time for your code snippet. It’s very useful if you want to automate a post or a popup at a specific moment. With this feature, your scripts can be programmed to run at any given:
- Date
- Time
- Date & time
- Day (1st day of the month to 31st)
- Day of week (Monday to Sunday)
- Month (January to December).
You can add as many combinations as you wish.
Condition for Oxygen page template.
Setting a condition to an Oxygen template is now easy. An example use case: implementing a global background colour change to a page that has a certain template (only execute the code on pages that contain a particular template). It's now possible to do so — all within Advanced Scripts!
See an example below:
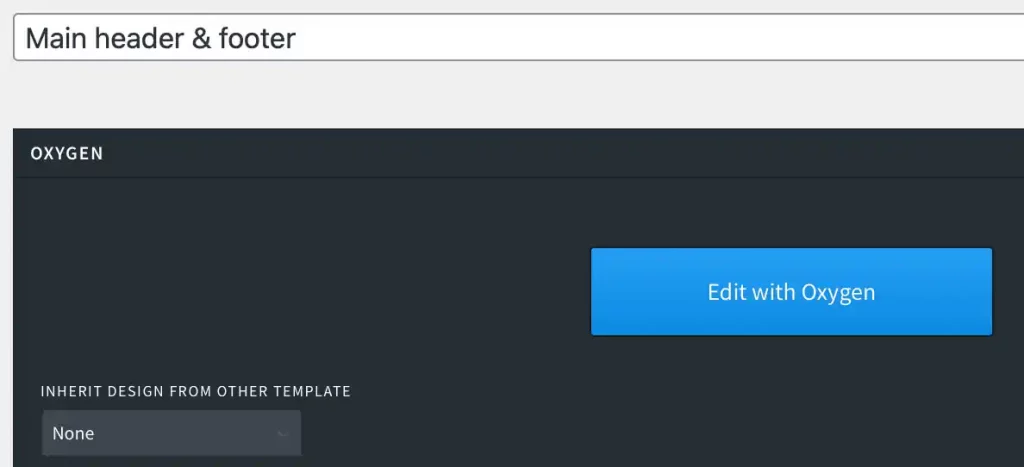
Step 1: Let's assume you have created two templates to be used on your pages named: i) Main header & footer (does not inherit any other templates), ii) Hero section, (inherits the main header & footer template)
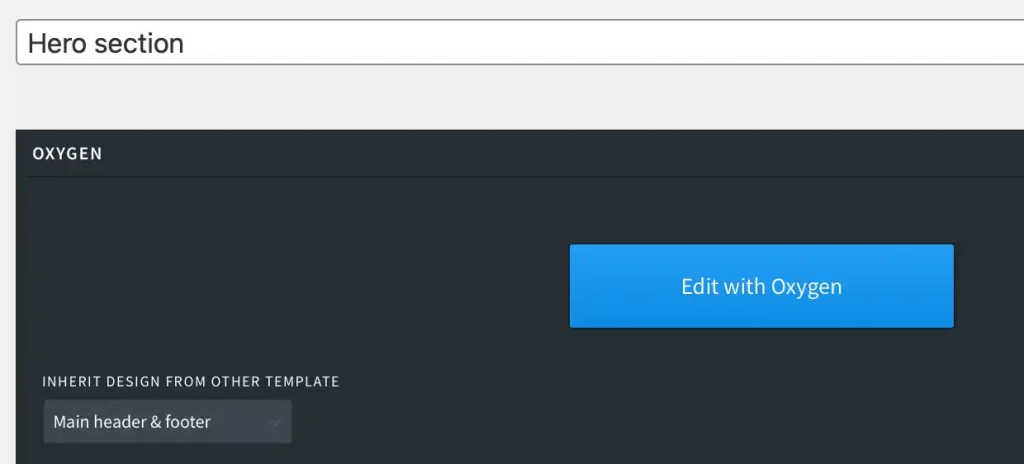
Step 2: Next, you create two pages and call them Page 1 and Page 2. In this case, Page 1 uses a template called “Main header & footer”. Whereas, Page 2 uses a template called “Hero section”.
Step 3: Now, you wish to add a pink colour background to a page that contains only the “Main header & footer” template.
However, Page 2 not only contains the “Hero section” template, but this template also inherits the “Main header & footer” template.
Step 4: Therefore, the solution is to be creative with the condition. In this scenario, you’d want to set some conditions so that the script targets a page that only contains the “Main header & footer” template, but that template does not contain the “Hero section”. See the conditions setup below.
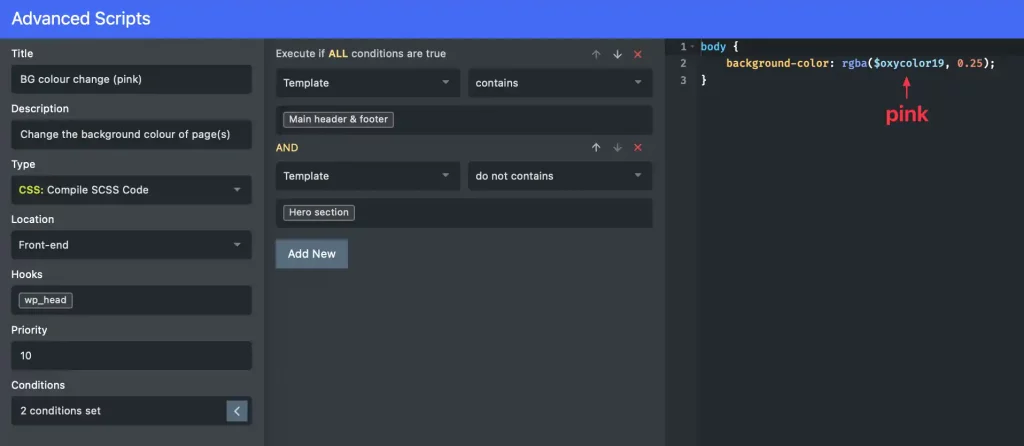
Step 5: When you switch to the front-end, you will see that the script was successfully executed — only Page 1 has a pink colour background.

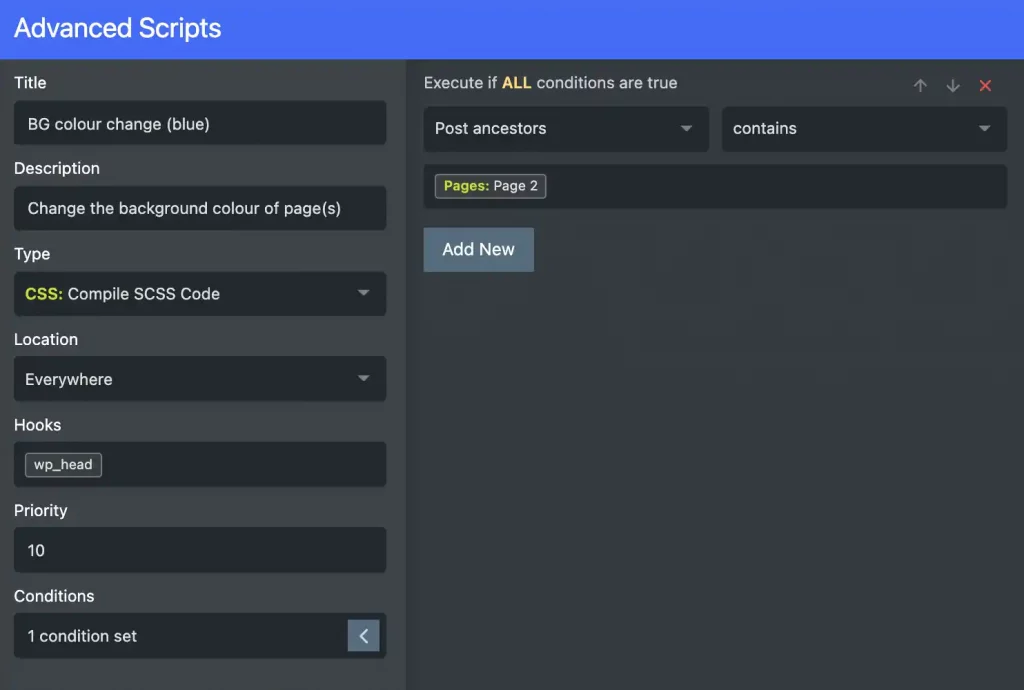
Condition for post ancestors (parents).
This feature will allow you to set condition(s) for the post or page ancestors. Let us try a simple example below.
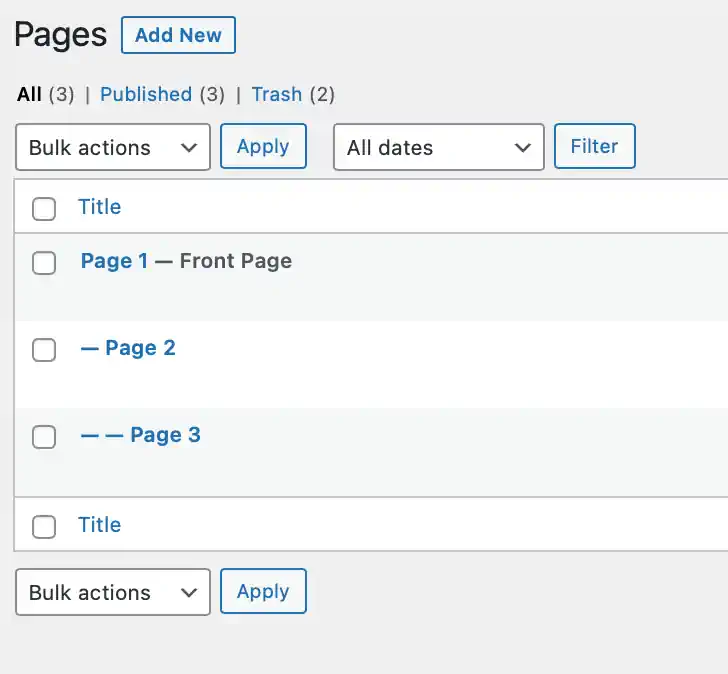
Assume you have three pages (Page 1, Page 2, Page 3), and you would like to set the Page 2 background colour pink, and Page 3 background colour blue.
Step 1: Nested the pages appropriately.
Step 2: Inspect the scripts in Advanced Script for any errors in the code editor.
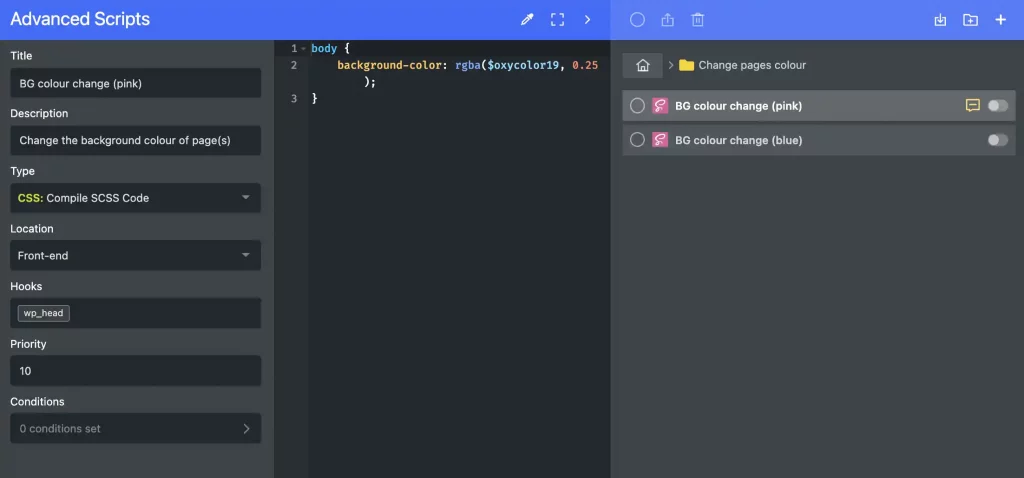
Step 3: Choose a condition with post ancestry for both scripts.
Set the condition on which post (or in this case, page) ancestor this script shall be executed.
Tips: To make Page 2 pink, the script's condition must be set to its ancestor (Page 1). Similarly, to make Page 3 blue, the script's condition must be set to its ancestor (Page 2).

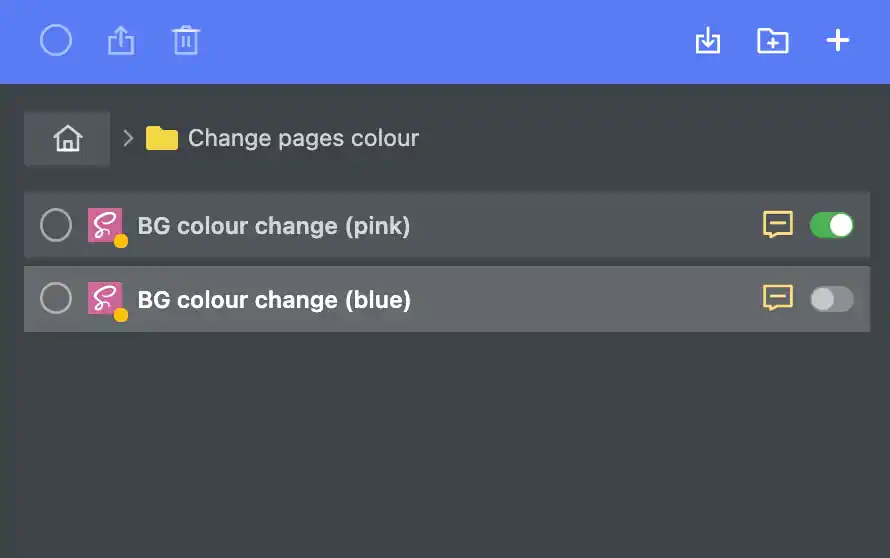
Step 4: Double check that the conditions are enabled for both scripts. Notice the “yellow dot” at the code snippet’s icon.
Step 5: Check the result on the front-end of the website.
If the scripts are executed correctly, you will see that Page 2 is now pink, and Page 3 is now blue.
Tip: If you do not see any changes to the front-end, please make sure to regenerate CSS or clear the cache.

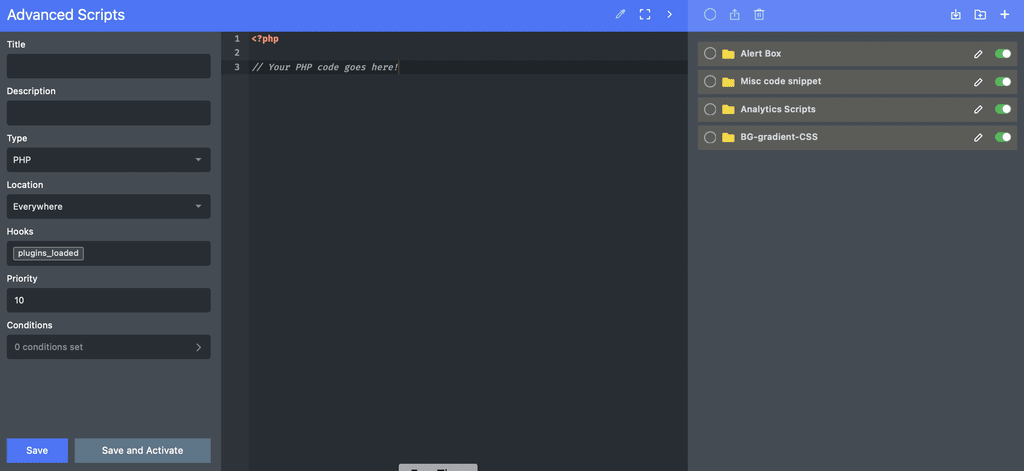
UI indicator for scripts with conditions.
Each time you set a condition to a script, a UI indicator (small yellow dot) will appear in the bottom right corner of the script’s icon, to indicate that a condition was set up for this particular script.
Import files by dragging files over the scripts list.
If you have any exported scripts files, you can now drag them inside the script folder that you have created. You can also import folders too, and it will appear as a folder in Advanced Scripts.

Ability to change JSON filename during export.
If you wish to export a folder (that contains all your scripts), or just a single script within the folder to another WordPress installation where Advanced Scripts is installed, you can do so by selecting the folder or script and clicking the export button on the top panel.
Before the export begins, you will be prompted to rename the folder or the script you wish to export. You can export and import scripts throughout your WordPress installations with this simple process.
That’s all! Hope you will enjoy the new update. If you haven’t, consider joining our Facebook group for the latest announcements and join the discussion if you encounter any issues.
Want to try these new features?
To make it easy for you to decide on your purchase, you can start a 7-Day free trial for all our products and plans. and you also have 30 days to request a full refund if the product didn't meet your expectations.